|
|||
|
|
|
||
| View Shopping Cart |
| Home |
| Guides Available |
| About the Author |
| Reviews |
| Testimonials |
| Free Articles |
| Contact Andrew |
| Terms & Conditions |
| Mailing List |
| Links |
 |
 |
Gibbs Guides.com
More high
quality information absolutely
free with every
Gibbs Guides newsletter.
Sign
up now!
A maximum fun, minimum cost warbird:
The story of my all-foam Hawker Hurricane.
By Toni Reynaud
Part 1 – Building the fuselage
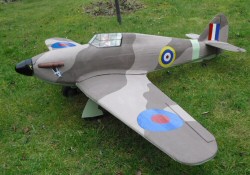
After the success of my all-foam Hercules, I wanted to try building an all-foam WW2 warbird, and the Tony Nijhuis free plan for the Hurricane seemed to be just right as a basis for me to work with.
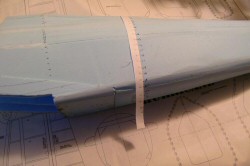
There were several things to consider, not the least of which was that for the fuselage - I thought I would just cut and hollow it in a similar way to the Hercules, but studying the plan showed that the rear part of the fuselage was strongly curved in two dimensions, so that method of construction was not viable. I did consider cutting a block of foam to the top and side views then sanding to profile, but that seemed like a lot of work and mess. After a bit of internet research, I decided on using the spine and former approach for the fuselage instead.
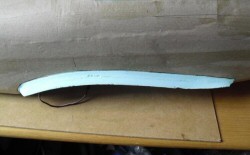
I started by cutting a spine from 6mm blue foam to the outline of the side view. I then cut each fuselage former to the outlines on the plan, and then removed 6mm from the centre line. Having marked the positions on the spine, I glued the former halves in place. I stuck 3mm skins to the side of the fuselage, which stiffened it up nicely, and covered the front sides and deck with single pieces of 3mm foam sheet, shaped by rolling it over the edge of a worktop. The top rear deck was too sharply curved to do the same, and there is also the kink where the cockpit shape enters the rear fuselage, so I planked that section with 3mm foam. I then added control snakes for the rudder and elevator, and finally closed the bottom of the fuselage with a slab of 10mm foam, and sanded the whole thing to get rid of glue lines and approach the final shape. 6mm doublers were added at the wing seating position.
|
|

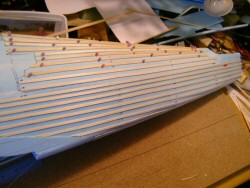
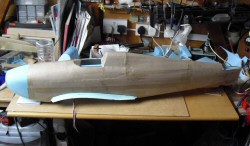
Having done that, I transferred the spacing of the stringers from the formers on the plan to strips of paper, and then on to the fuselage at the former stations. Using my trusty X-Acto balsa stripper, I cut out loads of 4mm strips from 1/32" balsa. These I glued to the foam fuselage at the pre-marked spacing to represent the stringers. The actual aircraft stringers could probably be better represented by 2mm strips placed in true scale positions, but that would be a lot more work.
|
|
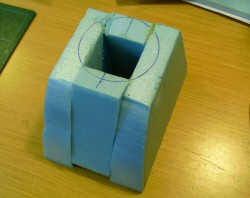
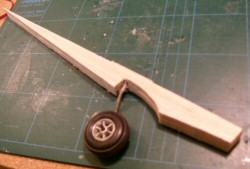
The Hurricane's cowling was formed from four rough-cut blanks, and the position of the circular F1 marked. I impaled the block on three cocktail sticks for positioning on the front of the fuselage, and added three spots of glue to hold it in place while carving/sanding. I also made up the sub-fin with the tail wheel mounting in place. This was then glued onto the bottom of the fuselage.
|
|
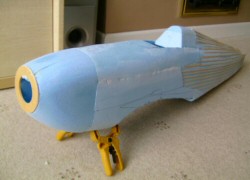
The last main job on the fuselage (apart from installing the power system!) was to make the wing fillets. For these, I glued a couple of layers of 6mm foam on to the sides of the fuselage above the wing opening, glued 1/16” balsa along the wing seat area underneath, and sanded the fillets to shape.
|
|
Click here for the next part